Deploy package using LCS
Using the following steps you can create the deployable package and deploy it through LCS.
Step-1 Open Visual studio and click on Dynamics365 Menu and select create deployment package from the deploy menu item.
Step-2 Select your model and set the output path of the model and click OK.
Step-3 Login to LCS then navigates to your project.
Ste-4 click on the hamburger icon and select Asset library.
Step-5 Now select software deploy-able package and click on the + icon to add your custom package.
Step-7 Click on Add file button to upload your deployable package.
Step-8 Now click on browse and select package then click on uplaod.
Step-9 You can find the package in the tab of software deploy-able tab Once the package is uploaded successfully.
Step-10 Once LCS mark package as valid. then go to your environment.
Step-11 Now click on Maintain and select apply the update.
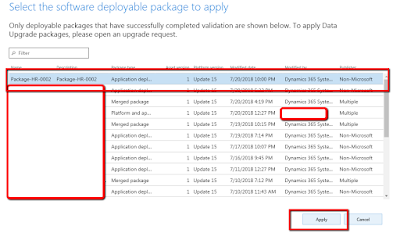
Step-12 Select your package and click on apply.
Once the package is completed sign Off the package, So it will visible to you on production deployment as well.
Please feel free to contact me if you are facing any issues during the implementation of this blog.


