Showing posts with label AX 2012. Show all posts

Get Field, Label, Type and Name D365FO


Get Field, Label, Type, and Name Using X++


Following are the way to get Table Label
static void Job21(Args _args)
{
    info(TablePName(CustTable));
}


Following are the way to get the Field Label of the table
static void Job21(Args _args)
{

    info(fieldPName(CustTable,AccountNum));
}


Following is the way to find the Label, Name, and Data type of all fields of any table.
static void Job21(Args _args)
{

    DictTable       dt=new SysDictTable(tableNum(CustTable));
    FieldId       _fieldId=  dt.fieldNext(0);
    DictField     _dictField;
    
while(_fieldId)
    {
      _dictField  =dt.fieldObject(_fieldId);
 info(strFmt("Field Name %1 , Field Lable %2 and Field Type %3", _dictField.name(),_dictField.label(),_dictField.type()));
     _fieldId=  dt.fieldNext(_fieldId);
    }
}


Data Source Join Types D365FO & AX 2012


Data Source join types


Form data source link type is a property of the form data source. We can add more than one table as a data source to the form. Those data sources should have the table level relation, So, then the developer not need to work on the coding part to find the related records. For example, if we create the order form, that order form has Student and student Attendance tables as form data sources. We can make part of both tables of the form data source and can make links as per requirement.


For Instance, We Created Two Tables.


  • Student
  • Student Attendance


Then Create a relation as per your requirement. I am using Normal relations.

Student

Student Attendance


Now create New Form and Add two Gird [StudentGrid] & [StudentAttendanceGird]


Let's begin


Passive Join Type


Passive form data source link type won't update the child data source automatically. For example, if we select the parent table order then order details child data source won't update. If we need to update the child data source we need to call the child data source to execute the query method by the program (code).


Active Join Type


Active link type updates the child data sources without any delay when you select the parent table record. When you deal with more records it will affect application performance.

Delay Join Type


Delay form data source link type is also same as active method the different is delay method won't update immediately when you select the parent record. It will update the child data source when you select the parent table, Ax uses a pause statement before update the child data source. 


Inner join Type


Inner join form data source link type displays the rows that match with parent table and child table. 


Outer join Type


Outer join form data source link type will return all parent records and matched child records. It will return all rows in the parent table. 

Exists Join Type


Exist join form data source link type return matched rows of the parent table. It behaves like an inner join but the difference is once the parent row is matched with child records then stops the process and updates in the grid, Ax won't consider how many records are in the child table for the parent row.

Not Exists Join Type


Not exist join form data source link type is a totally opposite method to exist join. It will return the not-matched parent records with child records.


Field Level Security Dynamics AX 2012 & D365FO


Filed Level Security using Security Privileges 


Field level security always remained a challenge while implementing the Dynamics either it is AX-2012 or Dynamics 365 finance & operations.

So in this article, I have tried to implement field-level security for demonstration purposes.

In this demo, we will explore Read, Write and No Access on Fields.

Step-1  Create Student Table with following Fields.
  1. Name
  2. Class
  3. Age
  4. Fee


Important
We will use Age & Fee Fields to implement Read, Write and No Access Security base on the User role rest of the fields will remain the same delete behavior.

  1. With No Access, Age & Fee fields will not visible to User
  2. With reading Access User can't Edit the Age and Fee Fields 
  3. With Write Access User can change the Age and Fee Fields


Step-2 Create a Simple List page and Add Student Table in the data source.. in the demo our form name is StudentSimpleListPage


Step-3  Create 3 Display Menu Items all will reference to StudentSimpleListPage

  • SL_Student_Read
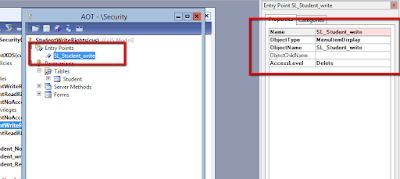
  • SL_Student_write
  • SL_Student_NoAccess


Step-4 Create 3 Security Privilege and Add Menu Items and Table
  • StudentNoAccess
  • StudentWriteRights
  • StudentReadRights 


  • StudentNoAccess

    • Add SL_Student_NoAccess Display Menu Item and set the Effective Access > Delete Level
    • Add Table Student and set the Effective Access > Delete Level.
    • Example screenshots are below.


    • Now Add All Fields and set the Effective Access to  Update Level on Name and class Fields and set Effective Access to No Access on Age and Fee filed.
    • Example screenshots are below.


  • StudentWriteRights

    • Add SL_Student_write Display Menu Item and set the Effective Access > Delete Level
    • Add Table Student and set the Effective Access > Delete Level.
    • Example screenshots are below.


    • Now Add All Fields and set the Effective Access to  Update Level to All Fields 
    • Example screenshots are below.


  • StudentReadRights 
    • Add SL_Student_Read Display Menu Item and set the Effective Access > Delete Level
    • Add Table Student and set the Effective Access > Delete Level.
    • Example screenshots are below.

    • Now Add All Fields and set the Effective Access to  Update Level on Name and class Fields and set Effective Access to Read Level on Age and Fee filed.
    • Example screenshots are below.


Step-4 Create 3 Security Roles with the below names and add security privilege to them accordingly

  • StudentWriteRights  (Role)
    • StudentWriteRights   (privilege)
  • StudentReadRights   (Role)
    • StudentReadRights    (privilege)
  • StudentNoAccess     (Role)
    • StudentNoAccess      (privilege)
Now it's time for verification, Required Customization is completed just compile the entire project.

Step-5  Verifications
Go To the Systems Administration and assign security StudentNoAccess role.


 Now Open The Dynamics AX with the user you assigned Security Role. You will find the Menu Item in Procurement And Sourcing Module. Menu Name is Student No Access


Now Open the Form and verify your customization. kindly check the below screenshot.


Go To the Systems Administration and assign security StudentReadRights role


 Now Open The Dynamics AX with the user you assigned Security Role. You will find the Menu Item in Procurement And Sourcing Module. Menu Name is Student Read Rights


Now Open the Form and verify your customization. kindly check the below screenshot.


You can download the Complete Demo XPO from the link

Active Ledger Dimension


Active Ledger Dimension 


You can use the following code sample to tet ledger dimension values for active account structure in AX 2012 & D365FO


  public static DimensionValue getdimensionValue(LedgerDimensionAccount _ledgerDimension, Name _dimensionName )
    {
        DimensionAttributeLevelValueAllView dimAttrView; //View that will display all values for ledger dimensionsDimensionAttribute dimAttr; //Main dimension attribute table

        select DisplayValue from dimAttrViewwhere dimAttrView.ValueCombinationRecId == _ledgerDimension //generalJournalAccountEntry.LedgerDimensionjoin BackingEntityType from dimAttrwhere dimAttr.RecId == dimAttrView.DimensionAttribute&& dimAttr.Name == _dimensionName; // Dimension field name
        return dimAttrView.DisplayValue;
    }

Country region specific condition in AX 2012 / D365FO


Country region specific condition in AX 2012 / D365FO


There is two way to restrict your customization with the country region.


  1. Code Level Restriction 
  2. Elements Level Restriction

Code Level Restriction 

           Below is a code & Screenshot  sample to restrict


#ISOCountryRegionCodes

if (SysCountryRegionCode::isLegalEntityInCountryRegion([#isoPK]))
{


// TODO

}


Elements Level Restriction

       Below is the element property & Screenshot sample to restrict.

In this blog, we are using output menu items to implement country-specific restriction 

Select Menu Item properties and Enter Country Code in country region code Property.

Screenshot sample


Now Build Your D365 Model and verify... Your code will execute and the element will show only if your company address is set as PAKISTAN.

Dialog With Event handling

Dialog With Event handling


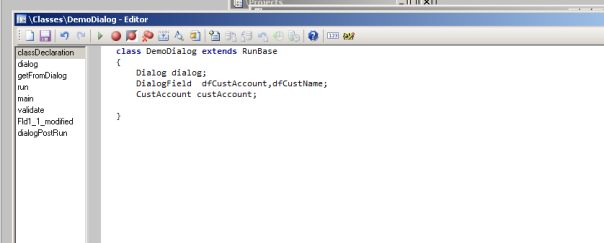
Create a Class with the name of Demo Dialog and extend it with RunBase class then write the following code.
dialog_1
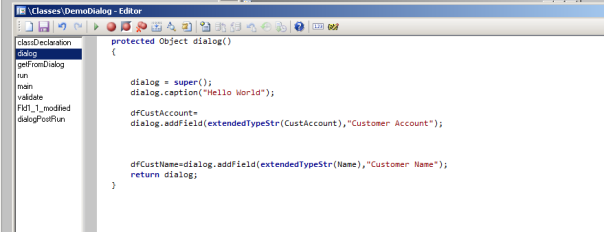
Override the dialog method and fields in dialog in my case I added two fields customer account and customer name.
dialog_2
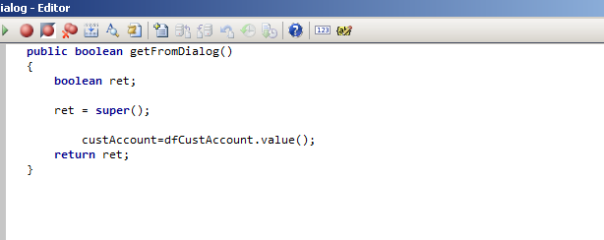
Override the getFromDialog method and set the value in the declared variable
dialog_3
Override the run method write the following code.
dialog_4
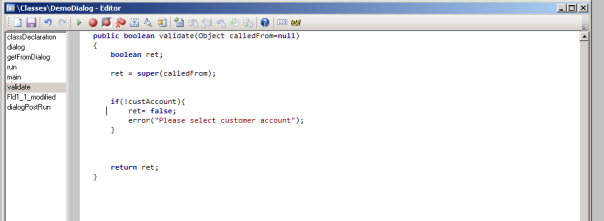
If you want to validate then override the validate method.
dialog_5
The dialogPostRun() method should override like below. This will allow calling to the event methods.
dialog_6
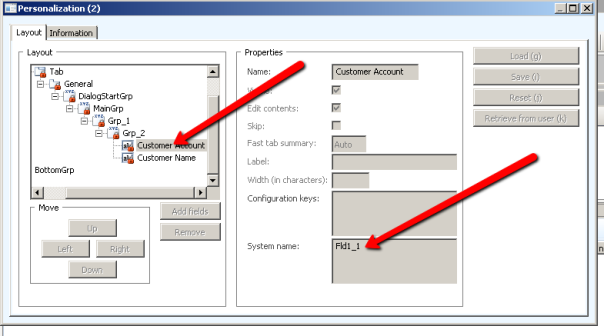
Now open dialog and personalize the customer account field and check the name of the field.
dialog_8
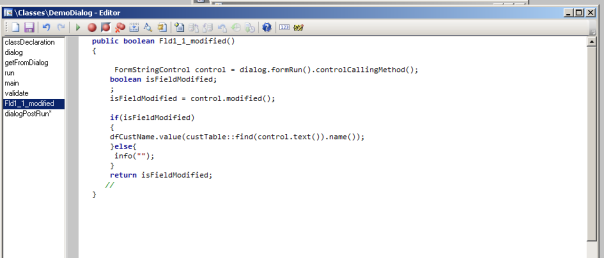
Then Create the modified event with a field name.
dialog_7
Now run the class and enjoy the modified events in the dialog ðŸ™‚

Calculate Start Date & End Date from Week & Year


Dates Calculation

In the below code, I have performed the calculation using start and end date, to understand in the detail, I would suggest you execute this code on your machine.


static void Job41(Args _args)
{
int weekJan1st;
int dayJan1st;
date tempDate,startDate,endDate;
int yr, week;
#TimeConstants
;
yr=2015; /* here i am assigning values in year and week */
week=54;
weekJan1st = wkofyr(dateStartYr(str2Date(strFmt(“%1-01-01”, yr), 321)));
dayJan1st = dayofwk(dateStartYr(str2Date(strFmt(“%1-01-01”, yr), 321)));
tempDate = dateStartYr(str2Date(strFmt(“%1-01-01”, yr), 321));
switch(firstWeekOfYear())
{
case 0: // Starts on Jan 1
tempDate -= (dayOfWk(tempDate) – 1);
tempDate += (week – 1 ) * 7;
break;
case 1: // First full week
//
// If 1st Jan is a Monday wkofyr gives the correct result
// If 1st Jan is a Tuesday-Thursday wkofyr gives one too much,
// as this 4/5/6 day week is given its own week number.
//
if (dayJan1st != 1)
tempDate += (8 – dayJan1st);
tempDate += (week – 1) * 7;
break;
case 2: // First 4-day week
if (mthofyr(tempDate) == 1 && weekOfYear(tempDate) > 50)
tempDate += week * 7;
else
tempDate += (week – 1) * 7;
tempDate -= (dayofwk(tempDate) – 1);
break;
}
startDate=tempDate-7;
endDate=tempDate-1;
info(strFmt(“%1,%2”,startDate,endDate));
}

Batch Job D365FO & AX 2012

            Batch Job D365FO & AX 2012

Following the below steps, You can create the batch job in simple steps.


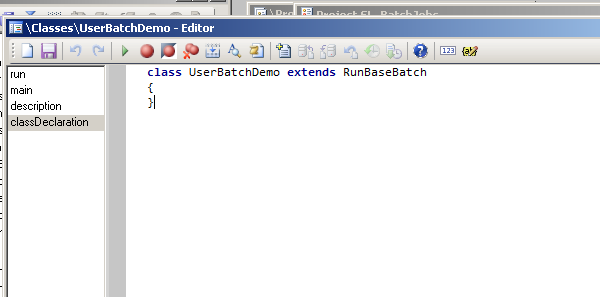
First Create a Class and extends it with the RunBaseBatch class

BatchJob_1
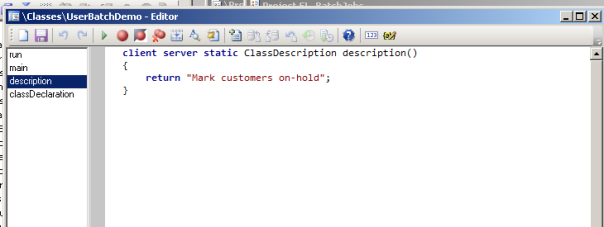
Then override the description method and return the job name. it will appear on job dialog.
BatchJob_2
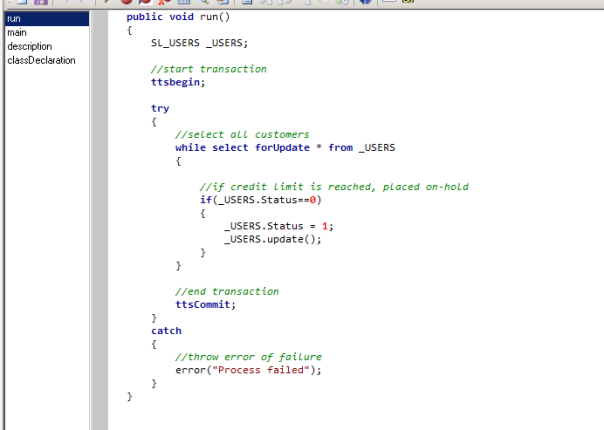
Now override the run method and write your logic. in my case i was updating the status from 0 to 1 in my custom table
BatchJob_3
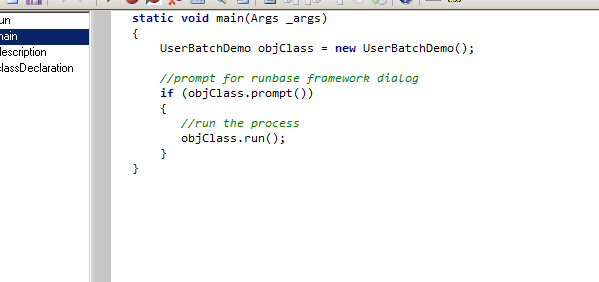
Now override the main method and run your code like the below image
D__tuts_blog_BatchJob_4
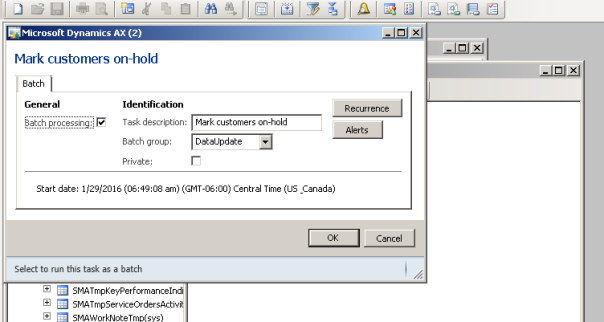
Now Run the class by right click and select open a dialog will appear like the below image.
2016-01-29_1749.png

Extensible Data Security (XDS) Role Base Security 2012 & D365FO

Extensible Data Security (XDS)  Role Base Security  2012 & D365FO

Overview


The Extensible Data Security policy framework is the Application Foundation framework provided by Microsoft Dynamics AX 2012 (new feature) in addition to the role-based security in order to secure the data.
Dynamics AX Admins and developers can use the security policies to block access to specific rows in a table. In the AOT, policies can be found under node Security > Policies.
XDS policy can be utilized for setting security privileges on the global address book.


Model of Extensible Data Security ( Source Link)


XDS concepts


Primary Table

A primary table is any table that will be used to restrict data in the constrained table. It is the table that is specified in the policy query.

Constrained Table

A constrained table is a table on which data filtering is applied. It can be a primary table or a table that is related to the primary table.

Policy Query

Policy query helps to secure data in the constrained table defined in the XDS. It is used to fetch data from the primary table, which is then used to restrict data in the constrained table.

Context

Context is the most important part of XDS without which security policy will not be applied. It defines the context in which security policy will be applied. It can have three possible values:
  1. ContextString: Defines a specific application context on which security policy will be enabled. It is also called an application context.
  2. RoleName: Defines that the security policy will only be applied to a particular Role in the application.
  3. RoleProperty: Used to define multiple Roles for a single security policy.


Important

  • Role Base security will remain the same for AX 2012 & D365FO
  • In this blog, we will focus on RoleName Context.


Let's Begin!

In this demo, we are Implementing XDS on Purchase Order and restricting with the warehouse. Initially, we will implement XDS with a static Warehouse range.

As part of this tutorial, security policy will be applied to the XDS Purchase Order Security Role role


Steps

  1. First, create a new Policy query. Open AOT Queries
  1. Right-click on Project and create a new Query XDS_PurchaseOrder


3.  Open Query Add New Data-Source Purch Table
4.  Set Dynamic Fields No and Manually Select One Field PurchID to Make sure performance will not hurt with your implementation.
5.  Add Range and select InventLocationId and set value properties. In my case, I have set the value 9221122W.


6. Save the query  (In Next Blog We will work with dynamic Range which user can control from UI Level)
7. Now next step is to create a security Role
8. Right click on Project and create a new Role XDS_PurchaseOrderSecurityRole


11. select security from the side panel and create Security Role and set the role proprieties Like the below screenshot. 

Important 
No privilege required 


12.  Now next step is to create a security Policy 
13. Right-click on Project and create a new security policy SLD_TransferOrderSecurityPolicy


14. select security from the side panel and create a Security policy.


15 set the security policy like below screenshot.


Now Build The Model and Sync Database if you are working on D365 and reset the IIS.

Go to Systems Administrator > Users Form and assign a newly created Role to any user, To whom you want to perform testing.


Enjoy.... :)

Important
XDS security will not work if the user has a Systems Administrator role. 


In Case of any issue, you guys are facing during the implementation of this blog... Feel free to ping me. 


Virtual Fields Vs Computed Fields

  Virtual Field: A virtual field in D365FO is a field that doesn't have a direct representation in the database. It's a field that y...