Showing posts with label LCS. Show all posts

Upgrade Environment using LCS D365


Upgrade Environment using LCS D365.


You can upgrade your 2-Tier environment to the latest build using LCS.


Step-1 Navigate to your required Environment and click on maintain.
Step-2 Now click on upgrade a popup window will appear.


Step-3 Popup window contains 3 fields to be filled.


  1. Target Environment 
  2. Preferred downtime start date
  3. Preferred downtime start time

Select the Build release on which you want to upgrade your environment and provide downtime as per your feasibility then click next. 


Following is the filled screenshot for your reference.


Step-4 Select the application version from the new window and click next.


Step-5 Now select the database type from the next window.

Three types are available 
  1. None 
  2. Demo 
  3. Public sector data


Step-6 select a custom package if you want to deploy with this upgrade.


Step-7 Enter the email address of the persons who will be notified of every action on the environment.


Step-8  select environment administrator. Only users will appear in the drop-down those who have administrator rights on Project and LCS.


Step-9 verify the summary


Step-10 Now enter your Account name in the text box and click save.


Service will submit to Microsoft and they will start working on the given time window.


Please feel free to contact me if you are facing any issues during the implementation of this blog.


Deploy package using LCS


Deploy package using LCS


Using the following steps you can create the deployable package and deploy it through LCS.

Step-1  Open Visual studio and click on Dynamics365 Menu and select create deployment package from the deploy menu item.


Step-2 Select your model and set the output path of the model and click OK.


Step-3 Login to LCS then navigates to your project.
Ste-4 click on the hamburger icon and select Asset library.


Step-5 Now select software deploy-able package and click on the + icon to add your custom package.


Step-6 Enter the package name and description. would be great if you are follow any naming sequence for packages.

Step-7 Click on Add file button to upload your deployable package.


Step-8 Now click on browse and select package then click on uplaod.


Step-9 You can find the package in the tab of software deploy-able tab Once the package is uploaded successfully.

Step-10 Once LCS mark package as valid. then go to your environment.


Step-11 Now click on Maintain and select apply the update.


Step-12 Select your package and click on apply.


Package deployment will start in few seconds. LCS will show you the progress of every step.


Once the package is completed sign Off the package, So it will visible to you on production deployment as well.


Please feel free to contact me if you are facing any issues during the implementation of this blog.


Production Database backup Request


Production Database backup Request Life cycle service


Using following steps you can request the database backup of production to your UAT Sandbox environment.


Step-1 Click on hamburger Icon and click on support menu item.


Step-2 Now click on Service request tab from left panel.

Step-3 Now click on Add icon a popup window will appear with 3 Different Request.

Step-4  Three type of service request available. Please click on Database Refresh Request.

Following are some information about service request.

Data Point in time restore request 
      This request we use to request Microsoft to restore the production DB on any particular date.

Other Request 
      In this service request we can ask for different options, Like ICM ticket or can request them to update the statistics of production database.

Database Refresh Request
     This service request we use to restore database from production to UAT.  


Step-5 On 1st Drop down select the source environment name. On 2nd drop down select target server name. provide the time window. and acknowledge the both agreement and click next.


Step-6 Mark check box to acknowledge the terms and conditions and click submit. 


You request submitted to Microsoft.


Please feel free to contact me if you are facing any issue while following this blog.


D365 Support Ticket Using LCS

D365 Support Ticket Using LCS


There are Two type of Tickets are available in LCS for D365FO 


  1. Normal Support Ticket 
  2. Production Outage


Normal Support Ticket


This ticket is available for you all hosted environment of LCS. using following steps you can create the ticket.


Step-1  Login to LCS to Enter on your project tile.
Step-2  click on ham-burger icon and click on support menu item

Step-3 Click on support tab from left panel and then click on submitted to Microsoft Tab.
Step-4 Now Click on Submit incident.


Step-5 There are 5 different category available please select the category as per your requirement and click next. in my case i have selected last category.


Step-6 In below image you can find more sub category. select the issue related category and click on next. For demo purpose i have selected Document routing agent.


Step-7 Fill the required field. select environment and enter all information related to the Error you are facing and click next.


Step-8 Enter Contact person information, To whom Microsoft will contact to discuss the issue.
In the last of the screen you find the additional Email section. 

Here you can Enter the email address so Microsoft will remain them in loop of email conversation. 

Step-9  This is the final step of normal support ticket. Please select subscription type of ticket and category and click submit. 

Production Outage


This type of ticket Microsoft reveal for their customer on end of the Dec-2017. This ticket only available for production server only. Microsoft engineer use to called this Red Button.

using following steps you create Production outage.

Step-1  Login to LCS to Enter on your project tile.
Step-2  click on ham-burger icon and click on support menu item


Step-3 Click on support tab from left panel and then click on submitted to Microsoft Tab.
Step-4 Now Click on Report production outage.


Step-5 Set the check box yes and select the issue type from drop down and click continue.


Step-6 Enter the title of the issue. 
Step-7 Mark check box yes if you receiving any error message.
Step-8 Mark check box yes if you if you tried this on another browser.
Step-9 Mark check box yes if you know when production outage begin.
Step-10 Enter Detail of the issues and click next.
Step-10 Enter the contact person Information and click next. In next window you will get the ticket reference number.


Please feel free to contact me if you are facing any issue while following this blog.

Process Data packages Life Cycle Services


Process Data packages


Following are the steps to create Process data packages using LCS and apply to your environment.


Step-1 Navigate to Data Management Workspace and click on Export Tile.

Reference screenshot


Step-2 select any entity and export the data in Excel. Which we will use in the next step. then click on download the package.

Reference screenshot


Step-3 Now login to LCS and navigate to Assets library and click on the data packages Tab.

Step-4 Add the New data package and upload the package. which we downloaded in step-2. 

Reference screenshot


Step-5 Now click on Process Data Packages and click on the + icon to add a new PDP.

Step-6 Pre-requisite Business Process required to create Process Data Package.

Step-7 Click on + Icon to add Process data packages. Popup will appear fill out the required fields and click on confirm.


Reference screenshot


Step-8 New screen will appear in 3 to 4 seconds. 

Step-9 Select the business process (Step-6) and click on Next.

Reference screenshot


Step-10 Now click on select data packages and select your required package from the popup and click confirm.

Reference screenshot


Step-11 Add the package dependency if any. in my case there is no dependency. so I skipped this step and click on next for the last step of this wizard.

Reference screenshot


Step-12 Now select your business process and click on data packages and save the complete process.

Reference screenshot


Step-13 Navigate to the Assets library again and click on the Process data packages Tab.

Step-14 Select your required Process and click on consume icon.

Reference screenshot


Step-15 Click on consume new process data packages.

Reference screenshot


Step-16 fill the required fields like the below screenshot and click on Create.

Reference screenshot


 Step-17 Now click on newly created records to open the PDP in the new window.

Reference screenshot


Step-18 New window has 3 following steps.
  1. Review
  2. Review & Approval
  3. Apply Data package.

Step-19 select the process node and Mark process as reviewed. In my case, I have marked the complete process as reviewed.

Reference screenshot


Step-20 On the 2nd step mark as approved this operation will navigate to you on the new screen.

Step-21 Click on approve icon to change the status from Not Started to Approve

Reference screenshot


Step-21  If you want to change the data package click on upload data package else skip this step.

 Reference screenshot


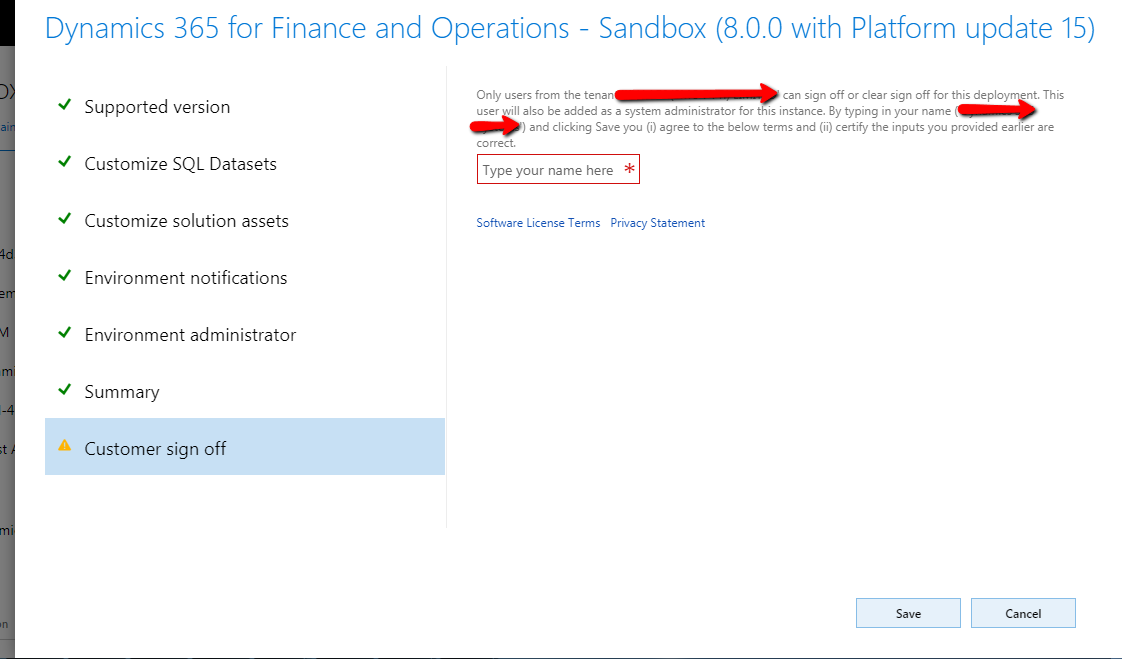
Step-22 Click on Apply icon to start the process. To perform this activity you should have Admin (tenant user on) your desired environment.

Step-23 Select the company from the popup and click on apply.

Reference screenshot


Step-24 Once the process starts, it will change the status to in-progress then complete if everything works fine.

Reference screenshot


Please feel free to contact me if you are facing any issues during the implementation of this blog. 


Virtual Fields Vs Computed Fields

  Virtual Field: A virtual field in D365FO is a field that doesn't have a direct representation in the database. It's a field that y...